Lash Lift Kit Instructions: A Comprehensive Guide
Embarking on a lash lift journey requires careful adherence to instructions for optimal results. This comprehensive guide provides detailed steps for using a lash lift kit effectively. From lash preparation to post-lift care, each stage is crucial for achieving beautifully lifted lashes. Understanding the process ensures a safe and successful transformation.
Lash lifts have emerged as a popular alternative to lash extensions, offering a low-maintenance solution for enhancing natural lashes. Unlike extensions, which involve attaching synthetic fibers, a lash lift works by perming your existing lashes to create a semi-permanent curl. This process makes the eyes appear bigger and more open, improving the overall appearance, especially for those with mature or downward-facing lashes.
The procedure involves using chemical solutions to break down and restructure the lashes, giving them a lifted and curled shape. Clients often seek lash lifts to avoid the hassle of mascara or to achieve a more voluminous look without extensions. The results typically last for 6 to 8 weeks, depending on individual lash growth cycles.
For those considering lash lifts, it’s essential to understand the process and aftercare involved. Consulting with a trained professional is recommended, especially for beginners, to ensure safety and optimal results. Lash lifts can be a fantastic way to enhance your natural beauty with minimal effort.
Essential Components of a Lash Lift Kit
A comprehensive lash lift kit contains several essential components needed to perform the procedure effectively and safely. These components work together to lift, set, and nourish the lashes, ensuring a long-lasting and beautiful result. Understanding each component’s role is crucial for a successful lash lift experience.
Lifting Cream (Step 1 Solution): This cream breaks down the disulfide bonds in the natural lashes, allowing them to be reshaped.
Setting Lotion (Step 2 Solution): Also known as the fixing lotion, this solution reforms the bonds, setting the lashes into their new lifted shape.
Silicone Shields or Rods: These are curved pads that come in various sizes to accommodate different lash lengths and desired curl intensity.
Lash Adhesive: Used to secure the lashes to the silicone shields, ensuring they stay in place during the lifting process.
Y-Tool or Lash Lifting Tool: This tool helps comb and isolate the lashes onto the shield, ensuring each lash is properly positioned.
Under-Eye Pads: These protect the lower lashes and delicate skin under the eyes during the procedure.
Nourishing Oil or Serum: Applied after the lift to hydrate and nourish the lashes, restoring moisture and promoting healthy growth.
Step 1: Lash Preparation and Cleansing
Before initiating the lash lift procedure, thorough preparation and cleansing of the lashes are paramount. This step ensures that the lifting solutions can effectively penetrate the lashes and that the results are long-lasting. Any residual makeup, oils, or debris can hinder the lifting process, leading to uneven or unsatisfactory outcomes.
Begin by using an oil-free makeup remover to gently remove all traces of makeup from the eyelids and lashes. Oil-based products can leave a residue that prevents the lifting solutions from properly adhering to the lashes. Next, use a lash cleanser or a mild, oil-free facial cleanser to wash the lashes thoroughly.
Employ a soft brush or cotton swab to gently scrub along the lash line, ensuring that all impurities are removed. Rinse the lashes with water and pat them dry with a lint-free cloth or disposable applicator. It is crucial to ensure the lashes are completely dry before proceeding to the next step.
For optimal results, consider using a lash primer specifically designed for lash lift treatments. This will help to further cleanse and prepare the lashes, creating an ideal surface for the lifting solutions to work effectively.
Step 2: Selecting and Applying the Correct Shield Size
Choosing the right shield size is a crucial determinant in achieving the desired lash lift effect. The shield’s curvature dictates the extent of the lash curl, so selecting the appropriate size is essential for a personalized and flattering outcome. A shield that is too small will result in an overly dramatic, unnatural curl, while a shield that is too large may not provide sufficient lift.
To determine the correct shield size, hold different shields against the client’s lash line. The lashes should extend almost to the end of the shield without overlapping excessively. The lash tips should comfortably reach the end of the shield. If the lashes extend beyond the shield’s edge, opt for a larger size. Conversely, if they fall significantly short, choose a smaller one.
Once the appropriate size is selected, apply a thin layer of lash adhesive to the back of the shield. Position the shield as close to the lash line as possible, ensuring it adheres securely to the eyelid. The shield should be centered and aligned with the natural curve of the eye.
Press gently but firmly to ensure proper adhesion. A well-placed shield provides a stable base for the subsequent steps, contributing significantly to the overall success of the lash lift. It is crucial to verify that the client feels comfortable and that the shield is not causing any irritation.
Step 3: Applying Lash Adhesive and Securing Lashes to the Shield
This step is paramount for achieving a uniform and lifted lash appearance. Begin by applying a thin layer of lash adhesive to the silicone shield, working in small sections to prevent the glue from drying prematurely. A lash lifting tool, or Y-tool, assists in this process, ensuring each lash is individually separated and adhered to the shield.
Starting from the inner corner of the eye, gently comb the lashes upwards onto the shield. Isolate each lash, ensuring they are straight and evenly spaced. Avoid overlapping or crisscrossing, as this can lead to an uneven lift. The goal is to create a smooth, fanned-out arrangement of lashes across the shield.
If a lash resists adhering, apply a tiny amount of additional adhesive and reposition it carefully. Patience is key during this stage, as a meticulous application will significantly impact the final result. Continuously check the alignment and separation of the lashes, making adjustments as needed.
Ensure the lashes are securely attached to the shield, as loose lashes will not lift properly. Once all lashes are adhered, double-check for any stray hairs or inconsistencies. A clean, well-organized lash arrangement sets the foundation for a successful and beautifully lifted lash transformation.
Step 4: Application of Lifting Cream (Step 1 Solution)
Carefully dispense a small amount of the lifting cream, also known as Step 1 solution, into a clean application palette. Using a micro brush or applicator, gently apply the cream to the mid-section of the lashes, starting just above the lash line and avoiding the tips. Ensure the cream is evenly distributed across all the lashes adhered to the silicone shield.
The lifting cream is designed to break down the disulfide bonds within the natural lashes, allowing them to be reshaped. Precision is crucial; avoid getting the solution on the skin or the very tips of the lashes to prevent over-processing or irritation. Focus on coating the area where you want the lift to be most pronounced.
Apply the cream in a dabbing motion, ensuring each lash is adequately covered. Check for any gaps or inconsistencies in the application. The lifting cream should be applied uniformly to achieve an even and consistent lift across all lashes. Proper application sets the stage for the next step, where the processing time will determine the final curl and lift of the lashes.
After application, carefully monitor the lashes and ensure they remain neatly adhered to the shield. Any stray or misaligned lashes should be gently repositioned to maintain the desired shape and separation.
Step 5: Processing Time for Lifting Cream: Considerations for Lash Thickness
Determining the correct processing time for the lifting cream is paramount to achieving the perfect lash lift without damage. Lash thickness plays a significant role in this decision. Finer lashes process faster than thicker lashes, so adjusting the time accordingly is crucial.
For fine or thin lashes, a shorter processing time, typically between 8-10 minutes, is recommended. Medium thickness lashes usually require 10-12 minutes, while thicker, more coarse lashes may need 12-15 minutes. Always err on the side of caution, especially if it’s your first time performing a lash lift, and start with a shorter time frame.
Closely monitor the lashes during the processing time. Check for any signs of over-processing, such as frizziness or breakage. If you notice any adverse reactions, immediately remove the lifting cream. Some professionals recommend covering the lashes with cling film during processing to help maintain moisture and enhance the lifting effect, but this is optional.
Accurate timing ensures the disulfide bonds in the lashes are properly broken down and ready to be reshaped, resulting in a beautifully lifted curl. Remember, under-processing may result in a weak lift, while over-processing can damage the lashes. Adjust the processing time based on your client’s unique lash characteristics for optimal results.
Step 6: Application of Setting Lotion (Step 2 Solution)
Following the lifting cream, the next crucial step is the application of the setting lotion, also known as Step 2 solution. This solution neutralizes the lifting cream and reforms the disulfide bonds in the lashes, locking them into their newly lifted shape. Proper application is vital for a long-lasting and defined curl.
Ensure all traces of the lifting cream are completely removed before applying the setting lotion. Use a clean applicator or cotton swab to gently wipe away any residue. Next, apply a generous amount of the setting lotion to the lashes, ensuring they are fully coated from base to tip.
The setting lotion should be applied evenly, mirroring the area where the lifting cream was applied. Avoid getting the solution into the eyes, as it may cause irritation. Leave the setting lotion on for a duration equal to or slightly less than the lifting cream processing time.
This timing is crucial for properly setting the lash shape without over-processing. During the processing time, the setting lotion works to stabilize the lashes and maintain the lifted curl. Once the timer goes off, carefully remove the setting lotion with a clean, damp cotton pad. With the setting lotion complete, the lashes are now ready for the next optional steps.
Step 7: Tinting the Lashes (Optional)
Tinting the lashes after a lift is an optional step that can significantly enhance the overall effect, making lashes appear darker, fuller, and more defined. This is particularly beneficial for those with lighter-colored lashes, as it adds depth and intensity without the need for mascara. However, it’s crucial to consult with the client to determine if tinting aligns with their preferences and lash needs.
Prior to tinting, ensure all traces of the setting lotion are completely removed from the lashes. Apply a protective barrier, such as petroleum jelly, to the skin around the eyes to prevent staining. Mix the lash tint according to the manufacturer’s instructions, typically involving a developer and color cream.
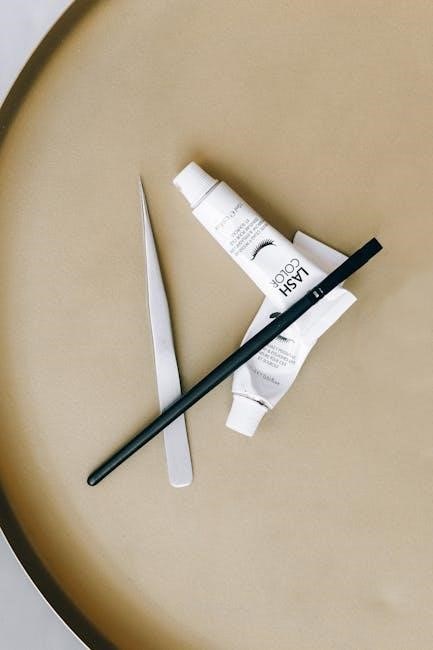
Carefully apply the tint to the lashes, ensuring each lash is evenly coated from root to tip. Avoid getting the tint into the eyes, as it can cause irritation. Allow the tint to process for the recommended time, usually a few minutes, depending on the desired intensity and tint product.
Once the processing time is complete, gently remove the tint with a damp cotton pad, ensuring no residue remains. Be thorough in rinsing the lashes to prevent any lingering tint from causing irritation. The result should be beautifully enhanced lashes that complement the lifted curl, creating a stunning, eye-catching effect.
Step 8: Nourishing the Lashes After the Lift
Following the lash lift and optional tinting, it is vital to nourish the lashes to restore moisture and promote their health. The lifting process can temporarily dry out the lashes, making them more susceptible to damage if not properly cared for. Nourishing the lashes helps to replenish lost moisture, strengthen the lash structure, and maintain their overall vitality.
Apply a lash-nourishing serum or oil, such as keratin-based serum, castor oil, or argan oil, to the lashes. These products are rich in vitamins and nutrients that penetrate the lash follicles, promoting growth and preventing breakage. Gently coat the lashes from root to tip, ensuring even distribution of the nourishing agent.
Allow the serum or oil to absorb into the lashes for several minutes, or as directed by the product instructions. Avoid rubbing or tugging at the lashes during this process to prevent any damage. For optimal results, incorporate lash nourishing into your daily routine, especially before bedtime, allowing the serum or oil to work its magic overnight.
Regular nourishment will help maintain the health and appearance of your lifted lashes, ensuring they remain strong, hydrated, and beautifully enhanced for an extended period. This step is crucial for long-term lash health and maximizing the benefits of the lash lift treatment.
Step 9: Removing Lashes from the Shield and Final Cleaning
Once the processing time for all solutions is complete and the lashes have been nourished, carefully remove them from the silicone shield. This step requires a gentle touch to avoid any unnecessary pulling or damage to the newly lifted lashes. Use a clean, damp cotton swab or a specialized lash lift tool to gently separate the lashes from the shield, working from the base upwards.
Ensure that all adhesive residue is removed from the lashes and the surrounding eye area. Use a gentle, oil-free cleanser specifically designed for the eye area to thoroughly clean the lashes. Gently wipe the lashes in a downward motion, avoiding any harsh rubbing or tugging. Repeat this process until all traces of adhesive and solutions are completely removed.
After cleaning, carefully inspect the lashes to ensure they are free from any remaining residue. A clean lash line is essential for preventing irritation and maintaining the longevity of the lash lift. Use a clean mascara wand or spoolie to gently brush through the lashes, separating them and ensuring they are evenly spaced.
This final cleaning step is crucial for achieving a polished and professional look. It also helps to promote lash health and prevent any potential complications. Once the lashes are clean and dry, you can admire your beautifully lifted lashes and proceed with any desired makeup application.
Troubleshooting Common Lash Lift Issues

Post-Lash Lift Care and Maintenance
Proper aftercare is essential for prolonging the life and enhancing the appearance of your lash lift. For the first 24-48 hours, avoid getting your lashes wet, as this can disrupt the lifting process and cause the lashes to relax prematurely. This includes avoiding activities such as swimming, saunas, and steam rooms.
Refrain from using oil-based products around the eyes, as these can break down the lifting solution and cause the lashes to lose their curl. Opt for water-based or lash-lift-friendly makeup removers and cleansers. When cleansing the eye area, gently pat the lashes dry instead of rubbing them vigorously.
Avoid using waterproof mascara, as it can be difficult to remove and may require excessive rubbing, which can damage the lashes. If you choose to wear mascara, select a gentle, non-waterproof formula and apply it sparingly. Use a lash brush or spoolie to gently comb through your lashes daily to maintain their shape and prevent clumping.
Consider applying a lash-conditioning serum or oil to nourish and hydrate the lashes, promoting their overall health and strength. Schedule regular lash lift maintenance appointments every 6-8 weeks to maintain the lifted effect as your natural lashes grow out. With proper care and maintenance, you can enjoy beautifully lifted lashes for an extended period.
