
James Hardie Fine Texture Cladding Installation Guide: A Comprehensive Plan
This guide details installing James Hardie’s fine texture cladding, covering substrate prep, cutting, fastening, flashing, and finishing—ensuring a durable, beautiful exterior.
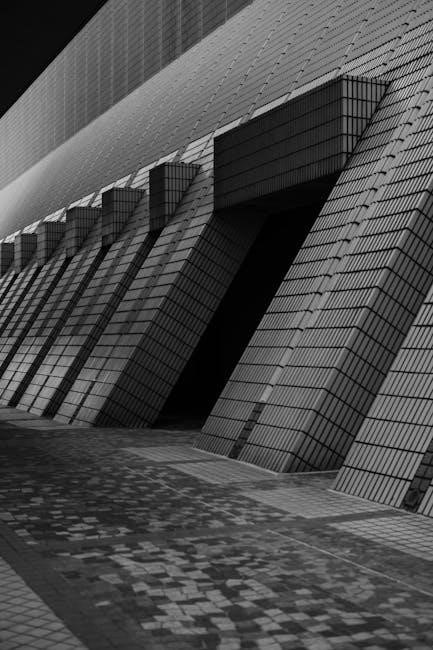
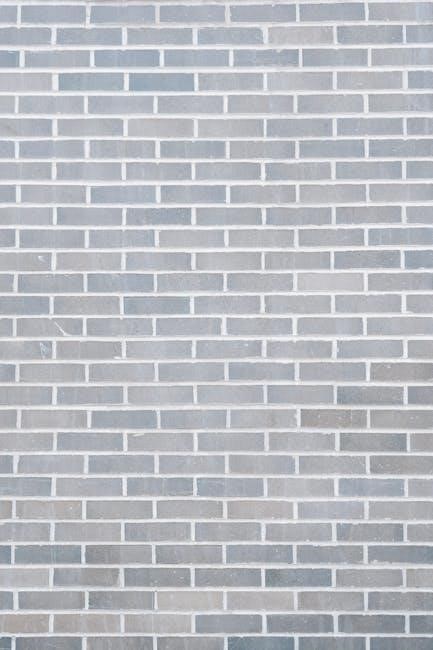
James Hardie Fine Texture Cladding represents a significant advancement in exterior building materials, offering homeowners and builders a durable, aesthetically pleasing, and low-maintenance siding solution. This cladding is engineered to mimic the look of traditional wood, but with superior resistance to common issues like rot, decay, and insect damage. It’s composed of fiber cement, making it incredibly resilient against harsh weather conditions – including fire, hail, and strong winds.
The “fine texture” finish provides a subtle, refined appearance, enhancing the curb appeal of any home. Unlike smooth siding, the textured surface minimizes the visibility of common imperfections. This introduction will serve as a foundational guide, preparing you for a successful installation process, covering everything from necessary tools to crucial safety precautions. Proper installation is key to maximizing the lifespan and performance of this premium cladding.
Understanding the Benefits of Fine Texture Cladding
Choosing James Hardie Fine Texture Cladding offers a multitude of advantages over traditional siding options. Its inherent durability provides exceptional resistance to fire, pests, and the damaging effects of moisture, significantly reducing long-term maintenance costs. The fiber cement composition ensures dimensional stability, minimizing warping, cracking, and fading – preserving its aesthetic appeal for decades.
Beyond longevity, this cladding enhances a home’s energy efficiency, contributing to lower utility bills. The fine texture subtly masks imperfections, offering a premium look without demanding constant upkeep. It’s also a sustainable choice, manufactured with environmentally responsible practices. Investing in James Hardie means investing in peace of mind, knowing your home is protected by a superior, long-lasting exterior solution.
Tools and Materials Required for Installation
Successful James Hardie Fine Texture Cladding installation demands specific tools and materials. Essential tools include a Hardie cutter (or fiber cement shear), circular saw with a dust-reducing blade, hammer, measuring tape, level, chalk line, and safety glasses. Fasteners require corrosion-resistant nails or screws designed for fiber cement.
Materials needed encompass the Hardie Fine Texture Cladding panels themselves, flashing for windows and doors, house wrap (moisture barrier), starter strips, and appropriate sealant. Don’t forget caulk, touch-up paint, and potentially furring strips depending on substrate conditions. Having a reliable ladder and scaffolding ensures safe access to all areas. Proper preparation with the correct tools streamlines the process and guarantees a professional finish.
Safety Precautions During Installation
Prioritizing safety is paramount when installing James Hardie Fine Texture Cladding. Always wear safety glasses to protect against dust and debris generated during cutting. A dust mask or respirator is crucial, as fiber cement dust can be harmful. Gloves protect hands from abrasion, and sturdy footwear provides stability.
When working at heights, utilize appropriate fall protection, including harnesses and secure scaffolding. Be mindful of power lines and maintain a safe distance. Proper lifting techniques are essential to prevent back injuries. Ensure the work area is clear of obstructions. Finally, familiarize yourself with the Material Safety Data Sheet (MSDS) for Hardie cladding to understand potential hazards and safe handling procedures.
Preparing the Substrate
Proper substrate preparation is fundamental for a successful James Hardie Fine Texture Cladding installation. Begin by thoroughly inspecting the framing, ensuring it’s structurally sound, level, and plumb. Correct any deficiencies before proceeding. A crucial step is installing a high-quality moisture barrier, overlapping seams appropriately to prevent water intrusion.
Adequate ventilation is equally vital; ensure the wall cavity allows for airflow to prevent moisture buildup and potential rot. Verify that all penetrations are properly sealed; The substrate must be clean, dry, and free of loose materials. Addressing these elements guarantees optimal adhesion and long-term cladding performance.
Inspecting the Framing
A meticulous framing inspection is the first critical step in preparing the substrate for James Hardie Fine Texture Cladding. Carefully examine all studs, joists, and sheathing for signs of rot, decay, or structural compromise. Ensure all framing members are securely fastened and meet local building code requirements.
Verify the framing is level, plumb, and square, as any irregularities will translate to the finished cladding. Replace any damaged or weakened framing components before proceeding. Correct any bowing or warping. A solid, stable frame provides the necessary foundation for a durable and aesthetically pleasing cladding installation.
Moisture Barrier Installation
Proper moisture barrier installation is paramount to protecting the structure behind James Hardie Fine Texture Cladding. A high-quality, breathable moisture barrier prevents water intrusion while allowing moisture vapor to escape, mitigating potential rot and mold growth. Overlap seams by a minimum of six inches, securing with appropriate staples or tape as per manufacturer’s instructions.
Ensure the barrier is continuous, extending from the foundation to the top of the wall, and properly sealed around all penetrations – windows, doors, and vents. This creates a robust shield against the elements, safeguarding the framing and ensuring the longevity of the cladding system.
Ensuring Proper Ventilation
Adequate ventilation is crucial behind James Hardie Fine Texture Cladding to prevent moisture buildup and maintain the integrity of the wall assembly. A ventilated cavity allows air circulation, removing any moisture that may penetrate the cladding system, thus preventing rot, mold, and structural damage.
Install intake vents near the base of the wall and exhaust vents near the top, ensuring a continuous airflow path. Maintain the recommended cavity width as specified by James Hardie, typically one inch, to facilitate effective ventilation. Proper ventilation significantly extends the lifespan of the cladding and the building itself.
Cutting and Fitting the Cladding
Precise cutting and fitting are essential for a professional-looking James Hardie Fine Texture Cladding installation. Begin with accurate measurements, accounting for overlaps and any necessary cuts around windows, doors, and corners. Utilize specialized Hardie cutting tools – a Hardie cutter, or fiber cement shears – to minimize dust and ensure clean, straight cuts.
Avoid using standard wood-cutting tools, as they can create excessive dust and damage the material. When fitting, maintain consistent reveal lines and ensure the cladding sits flush against the substrate. Proper cutting and fitting contribute significantly to the weather resistance and aesthetic appeal of the finished installation.
Measuring and Marking
Accurate measurement and precise marking are foundational to successful James Hardie Fine Texture Cladding installation. Start by carefully measuring the wall area, noting any irregularities or obstructions like windows and doors. Transfer these measurements onto the cladding material using a pencil and level, ensuring straight and consistent lines.
Account for the required overlap and reveal, typically around ¾ inch, when marking cut lines. Double-check all measurements before cutting, as errors can be costly. Utilize a speed square or framing square to guarantee 90-degree angles for corners and intersections. Proper marking minimizes waste and ensures a tight, professional fit.
Cutting Techniques for Fine Texture Cladding

Cutting James Hardie Fine Texture Cladding requires specialized tools and techniques to prevent damage and ensure clean lines. A fiber cement cutter, or a circular saw with a diamond blade, are recommended. Always wear safety glasses and a dust mask during cutting, as the process generates silica dust.
Score the cladding several times before making a complete cut, especially for straight lines. For intricate cuts, a jigsaw with a carbide-tipped blade can be used cautiously. Support the material adequately to prevent breakage. Avoid generating excessive dust by controlling blade speed and using a dust collection system. Clean cuts contribute significantly to the final aesthetic.
Installation Process: Step-by-Step Guide
Begin by establishing a level starting course, crucial for a visually appealing and structurally sound installation. Use appropriate fasteners – typically corrosion-resistant nails or screws – spaced according to James Hardie’s specifications. Ensure proper overlap at joints, typically a minimum of 1.5 inches, to prevent moisture penetration.
Stagger vertical joints to enhance the cladding’s strength and appearance. Maintain consistent reveals between boards. Regularly check for plumb and level as you progress. Proper fastener placement is vital; drive them flush with the surface without overdriving. Adhering to these steps guarantees a professional and long-lasting finish.
Starting the First Course
Establishing a perfectly level first course is paramount for a successful James Hardie cladding installation. Begin by marking a level line along the building’s base, utilizing a laser level or traditional spirit level for accuracy. This line serves as the foundation for all subsequent courses.
Ensure the starter course is securely fastened, as it bears the weight of the cladding above. Use appropriate corrosion-resistant fasteners, spaced according to Hardie’s guidelines. Check for plumb frequently during installation. A slightly uneven starter course will amplify errors throughout the entire project, impacting the final aesthetic and performance.
Fastener Selection and Placement
Correct fastener selection is crucial for James Hardie cladding’s longevity and warranty compliance. Always use stainless steel or corrosion-resistant fasteners specifically designed for fiber cement siding. Avoid using improper nails or screws, as they can cause premature failure and void the warranty.
Fastener placement follows a specific pattern – typically, a fastener is required every 12 inches along supports. Ensure fasteners penetrate the framing members adequately, and are driven to the correct depth, avoiding overdriving or stripping. Proper spacing and depth guarantee secure attachment and allow for natural expansion and contraction of the cladding, preventing buckling or cracking.
Overlap and Joint Details
Proper overlap and joint detailing are vital for weather resistance and aesthetic appeal when installing James Hardie fine texture cladding. A minimum overlap of 1.5 inches at side joints is generally recommended, ensuring water runoff and preventing moisture penetration. Stagger end joints to avoid continuous vertical seams, enhancing structural integrity and visual balance.
Pay close attention to joint sealing; use a high-quality, paintable sealant specifically designed for fiber cement. Ensure joints are clean and dry before applying sealant. Correct overlap and sealing prevent water damage, maintain the cladding’s appearance, and contribute to a long-lasting, durable exterior finish.

Flashing and Weatherproofing
Effective flashing and weatherproofing are crucial for a long-lasting James Hardie fine texture cladding installation. Prioritize proper flashing around all windows and doors to prevent water intrusion, utilizing compatible flashing materials and ensuring correct overlapping sequences. Pay special attention to corner flashing, employing pre-fabricated or custom-bent flashing to create a watertight seal.
Seal all penetrations, such as pipes and vents, with appropriate sealant. Consider the local climate and building codes when selecting weatherproofing materials. Thorough flashing and weatherproofing protect the structure, prevent mold growth, and maintain the cladding’s integrity for years to come.
Window and Door Flashing
Proper window and door flashing is paramount to prevent water damage behind the James Hardie fine texture cladding. Begin by installing drip edges above window and door headers to direct water away from the structure. Utilize self-adhered waterproof membrane around the window and door openings, extending onto the cladding itself for a secure seal.
Ensure the flashing integrates seamlessly with the window or door’s existing flashing system. Overlap flashing materials correctly, following the manufacturer’s recommendations. Pay close attention to corners and sill areas, ensuring complete coverage. A meticulously flashed window and door assembly safeguards against moisture intrusion and maintains structural integrity;
Corner Flashing Techniques
Effective corner flashing is crucial for weatherproofing James Hardie fine texture cladding installations. Utilize pre-fabricated metal corner flashing, ensuring it extends adequately onto adjacent cladding panels – typically at least 1.5 to 2 inches. Properly overlap corner flashing pieces, directing water outwards, away from the building’s interior.
Seal all seams and edges with a high-quality, paintable sealant compatible with both the flashing material and the cladding. For inside corners, consider using weepable corner flashing systems to allow any trapped moisture to escape. Accurate cuts and secure fastening are essential for a durable, watertight corner detail, preventing long-term damage.
Finishing Touches and Inspection
After cladding installation, meticulous finishing and a thorough inspection are paramount. Caulk all gaps around windows, doors, and corners with a paintable, exterior-grade sealant. Ensure all fasteners are properly recessed and concealed, or finished with touch-up paint matching the cladding’s color.
Inspect all joints and overlaps for consistent alignment and secure fastening. Verify proper flashing installation at all vulnerable areas. A final walk-around should identify any imperfections or areas needing attention. Addressing these details ensures a professional, long-lasting finish, maximizing the aesthetic appeal and protective qualities of your James Hardie cladding.
Common Installation Errors to Avoid
Several common errors can compromise James Hardie cladding’s performance and appearance. Incorrect fastener spacing is frequent; always adhere to Hardie’s specifications. Failing to pre-drill holes, especially near edges, can cause cracking. Improper overlap and joint detailing leads to water penetration. Insufficient substrate preparation—uneven framing or inadequate moisture barriers—is a critical mistake.
Avoid cutting cladding on the ground, which damages the textured surface. Neglecting flashing around windows and doors invites water damage. Always use appropriate safety gear. Careful planning, precise execution, and diligent adherence to the installation guide will prevent these issues, ensuring a durable and beautiful result.
Maintaining Your James Hardie Cladding
James Hardie cladding requires minimal maintenance, offering long-lasting beauty with simple care. Regular cleaning with a soft brush and water removes dirt and debris. Avoid using high-pressure washers, as they can damage the surface texture. Inspect annually for any signs of damage, such as cracks or loose fasteners, and address them promptly.
Touch up paint as needed to maintain the aesthetic appeal and protect against the elements. Promptly address any water stains or mildew growth with appropriate cleaning solutions. Proper maintenance extends the lifespan of your cladding and preserves its warranty. Consistent care ensures your investment remains protected and visually appealing for years to come.
Troubleshooting Installation Issues
Addressing installation challenges promptly ensures a flawless James Hardie cladding finish. Common issues include incorrect fastener depth – ensure nails or screws are properly seated without breaking the surface. Gaps between boards can occur from improper cutting or substrate irregularities; re-cut and refit as needed.
Efflorescence, a white powdery substance, may appear; it’s usually harmless and washes away. If cladding becomes loose, check fastener integrity and substrate condition. Incorrect overlaps can lead to water penetration; correct immediately. Always consult the installation guide for specific solutions. Document any persistent problems and contact James Hardie support for assistance.
James Hardie Warranty Information
James Hardie offers robust warranties protecting your investment in their cladding products. The standard warranty covers material defects for a specified period, often ranging from 50 years for residential applications, but this is contingent upon proper installation adhering strictly to their guidelines.
Proper priming and painting are crucial for maintaining warranty validity. Failure to follow installation instructions, including fastener schedules and flashing details, can void the warranty. Register your product promptly after installation to activate coverage. Detailed warranty information, claim procedures, and specific terms are available on the James Hardie website.
Local Building Codes and Regulations
Before commencing any James Hardie cladding installation, thoroughly investigate local building codes and regulations. These vary significantly by region and dictate requirements for fire resistance, wind load capacity, and structural integrity. Permits are often necessary, demanding detailed plans and inspections to ensure compliance.
Adherence to these codes is non-negotiable and crucial for legal and safety reasons. Local authorities may have specific stipulations regarding flashing, weather barriers, and fastener types. Ignoring these regulations can lead to costly rework, fines, or even project shutdown. Consult with your local building department for a comprehensive understanding of applicable rules.
Fine Texture Cladding vs. Other Hardie Products
James Hardie offers diverse cladding options, but Fine Texture distinguishes itself with a refined, subtle aesthetic. Compared to Smooth cladding, it provides a more forgiving surface, minimizing visible imperfections. Unlike the bolder profiles of Plank or Shiplap, Fine Texture offers a cleaner, contemporary look.
Fiber cement composition remains consistent across Hardie products, ensuring durability and weather resistance. However, Fine Texture’s reduced texture requires precise cutting and installation for optimal results. It’s often preferred for modern designs where a less pronounced texture is desired, offering a sophisticated alternative to other Hardie styles.

Painting and Colour Options for Fine Texture Cladding
James Hardie’s Fine Texture Cladding accepts a wide range of paints, enhancing its aesthetic versatility. Acrylic latex paints specifically formulated for fiber cement are recommended for optimal adhesion and longevity. Light to medium colours generally showcase the texture best, while darker shades can minimize its visibility.
Pre-primed cladding simplifies the painting process, but a quality primer is still crucial for uniform colour and enhanced durability. Consider Hardie’s ColorPlus Technology for factory-applied finishes offering extended warranties. Always follow paint manufacturer’s instructions regarding application techniques and drying times to achieve professional results and maintain the cladding’s integrity.
Dealing with Waste and Recycling
James Hardie cladding generates waste during installation, requiring responsible disposal and recycling practices. Offcuts, damaged pieces, and packaging materials should be managed effectively to minimize environmental impact. Check with local waste management facilities regarding fiber cement board acceptance for recycling; some facilities process it for alternative uses.
Properly contain and label all waste materials to prevent contamination. Dust generated during cutting requires careful collection and disposal according to local regulations. Consider donating usable offcuts to building material reuse centers. Prioritizing waste reduction through accurate measurements and careful handling minimizes disposal needs and promotes sustainable building practices.

Professional Installation vs. DIY
Installing James Hardie fine texture cladding presents challenges, prompting the question: professional installation or DIY? While experienced DIYers can tackle the project, professional installers possess specialized knowledge, tools, and experience ensuring a flawless, warranty-compliant result.

Incorrect installation can compromise the cladding’s performance and void the warranty. Professionals understand flashing details, proper fastening techniques, and building code requirements. DIY attempts may lead to costly repairs or premature failure. Consider your skill level, time commitment, and the project’s complexity before deciding. A professional installation offers peace of mind and long-term durability.
Resources and Further Information
For comprehensive support during your James Hardie fine texture cladding project, numerous resources are available. The official James Hardie website (www;jameshardie.com) provides detailed installation guides, technical documents, and product specifications. Local building supply stores often host workshops and offer expert advice.
Online forums and communities dedicated to home improvement can provide valuable insights and troubleshooting tips. Consult local building codes and regulations to ensure compliance. Don’t hesitate to contact James Hardie’s customer support for clarification on specific installation details or warranty information. Proper planning and access to reliable resources are key to a successful outcome.