
The Honeywell T6 Pro Wi-Fi Thermostat offers advanced temperature control, smart home integration, and energy-saving features. Designed for ease of use, it provides programmable scheduling and geofencing capabilities, ensuring optimal comfort and efficiency in your home. With Wi-Fi connectivity, it seamlessly integrates with smart devices, allowing remote temperature adjustments and voice control through compatible systems. This thermostat is ideal for modern households seeking convenience, reliability, and energy efficiency.
1.1 Overview of the Honeywell T6 Pro Wi-Fi Thermostat
The Honeywell T6 Pro Wi-Fi Thermostat is a cutting-edge, programmable device designed to enhance home comfort and energy efficiency. It features a sleek, user-friendly interface and advanced smart home integration capabilities. With Wi-Fi connectivity, it allows for remote temperature control via smartphones or voice assistants. The thermostat supports geofencing, scheduling, and energy-saving modes, making it ideal for modern households. Its compatibility with various HVAC systems ensures widespread applicability, while its energy-efficient design helps reduce utility bills. This thermostat combines innovation, convenience, and reliability for seamless temperature management.
1.2 Key Features of the Honeywell T6 Pro Wi-Fi Thermostat
The Honeywell T6 Pro Wi-Fi Thermostat boasts an array of features, including geofencing for location-based temperature adjustments, voice control compatibility with smart speakers, and advanced scheduling options. It offers energy usage reports to optimize savings and supports integration with smart home systems. The thermostat also features a user-friendly interface, adaptive recovery, and compatibility with various HVAC systems. Additionally, it includes a UWP mounting system for easy installation and a sleek, modern design that complements any home decor. These features make it a versatile and efficient choice for smart temperature control.
System Requirements and Compatibility
The Honeywell T6 Pro Wi-Fi Thermostat requires specific system compatibility and technical specifications to ensure proper installation and operation. Check HVAC compatibility, Wi-Fi requirements, and wiring configurations to guarantee seamless functionality and optimal performance.
2.1 Checking Compatibility with Your HVAC System
Before installation, ensure the Honeywell T6 Pro Wi-Fi Thermostat is compatible with your HVAC system; Verify voltage requirements, wiring configurations, and system type (e.g., forced air, heat pump). Compatibility issues may arise with older systems or non-standard setups. Consult the installation manual or contact customer support if uncertain. Proper compatibility ensures smooth operation, prevents damage, and maintains system efficiency. Always check Honeywell’s compatibility list or use their online tool to confirm suitability for your specific HVAC setup.
2.2 Wi-Fi Network Requirements for Thermostat Installation
A stable internet connection is essential for the Honeywell T6 Pro Wi-Fi Thermostat to function properly. Ensure your router supports 2.4 GHz Wi-Fi bands, as the thermostat is not compatible with 5 GHz networks. The network name (SSID) and password must be correctly entered during setup. Avoid using networks that require additional login steps, such as captive portals. Ensure the thermostat is placed in an area with a strong signal for reliable connectivity. A secure and stable Wi-Fi connection is crucial for remote access, scheduling, and smart home integration features.

Pre-Installation Steps
Before installing the Honeywell T6 Pro Wi-Fi Thermostat, ensure the power is off at the breaker box. Remove the old thermostat and prepare the necessary tools for installation.
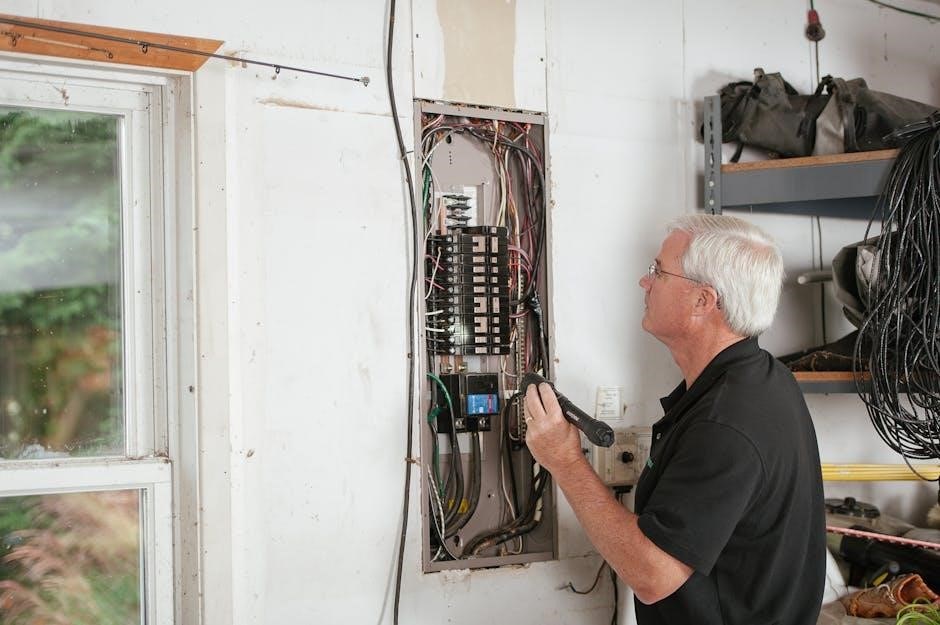
3.1 Turning Off Power at the Breaker Box
Locate the breaker box and switch off the HVAC system’s breaker to ensure no power is supplied to the thermostat. Verify the thermostat’s screen is dark to confirm power is off. Use a voltage tester for added safety before proceeding with installation.
3.2 Removing the Old Thermostat (If Applicable)
Before installing the Honeywell T6 Pro Wi-Fi Thermostat, carefully remove the old thermostat if it’s already installed. Start by taking photos of the wiring for reference. Gently pull the thermostat away from the wall to access the wires. Label each wire with its terminal designation (R, W, Y, G, C) to ensure proper reconnection later. Disconnect the wires from the old thermostat and set it aside. Handle the wires carefully to avoid damage or tangles. Double-check that the power remains off at the breaker box before proceeding.
Physical Installation of the Honeywell T6 Pro Wi-Fi Thermostat
Mount the Honeywell T6 Pro Wi-Fi Thermostat on the wall using the provided UWP mounting system. Ensure the surface is level and clean for secure installation. Follow the step-by-step guide for proper alignment and wiring connections to avoid errors. Use the included hardware to fasten the thermostat securely, ensuring stability and functionality. Proper physical installation is crucial for optimal performance and connectivity.
4.1 Mounting the Thermostat on the Wall
Mounting the Honeywell T6 Pro Wi-Fi Thermostat on the wall ensures proper installation and functionality. Begin by locating the wall studs or using anchors for stability. Use the provided UWP mounting system to align the thermostat correctly. Ensure the surface is clean, dry, and level for a secure fit. Gently press the thermostat onto the mounting plate, ensuring it clicks into place. Verify proper alignment and tighten the screws firmly. This step is critical for ensuring the thermostat operates smoothly and maintains accurate temperature readings. Proper mounting prevents issues with connectivity and performance.
4.2 Connecting the Wires to the Thermostat
Connect the wires to the Honeywell T6 Pro Wi-Fi Thermostat by matching the terminal labels (R, W, Y, G, C) with your HVAC system’s wiring. Ensure the power is off at the breaker box before proceeding. Strip the wire ends and securely attach them to the corresponding terminals on the thermostat. Use the slider tabs to set the correct wiring configuration based on your system type. Double-check all connections to avoid errors. Proper wiring ensures the thermostat functions correctly and communicates effectively with your HVAC system for optimal performance and control.
4.3 Using the UWP Mounting System
The UWP Mounting System provides a universal and secure way to install the Honeywell T6 Pro Wi-Fi Thermostat. Begin by removing the old thermostat and attaching the UWP plate to the wall using the provided screws. Align the new thermostat with the UWP plate, ensuring it clicks into place firmly. This system accommodates various thermostat sizes and ensures a level installation. Use the leveling tool if necessary to guarantee proper alignment. The UWP system simplifies the installation process, offering adaptability and stability for the thermostat.
Terminal Designations and Wiring
Understand terminal labels (R, W, Y, G, C) for proper wiring. Match wires to corresponding terminals on the Honeywell T6 Pro Wi-Fi Thermostat. Follow the manual for accurate connections.
5.1 Understanding the Terminal Labels (R, W, Y, G, C)
The terminal labels on the Honeywell T6 Pro Wi-Fi Thermostat are standardized for compatibility. R stands for the 24V power supply, while W controls heating. Y and G manage cooling and fan operations, respectively. The C terminal is for common wiring. Proper identification ensures correct connections. Refer to your HVAC system’s wiring diagram to match terminals accurately. Mislabeling can lead to system malfunctions. Always double-check connections before powering up the thermostat to ensure safe and proper installation.
5.2 Setting the Slider Tabs for Proper Wiring
Setting the slider tabs ensures proper wiring connections for your Honeywell T6 Pro Wi-Fi Thermostat. Locate the slider tabs on the thermostat’s wiring terminal block. Move the tabs to match your HVAC system’s wiring configuration, such as heat-only, cool-only, or heat-pump systems. Secure the tabs firmly to maintain proper contact. Always refer to your system’s wiring diagram for accuracy. Improper slider tab settings can lead to malfunctioning heating or cooling stages. Double-check your configuration before proceeding with installation to ensure reliable performance and safety.

Installer Setup and Configuration
Access the installer setup menu to configure advanced settings, such as temperature ranges, wiring configurations, and system modes. Ensure all options are set correctly for optimal performance.
6.1 Accessing the Installer Setup Menu
To access the installer setup menu on the Honeywell T6 Pro Wi-Fi Thermostat, power on the device and navigate to the main interface. Press and hold the “Menu” button until the advanced settings appear. Use the arrow keys to scroll to “Installer Setup” and select it. Enter the passcode if prompted (default is 1234). Once inside, you can configure system parameters, wiring settings, and other advanced features. Save changes before exiting to ensure proper functionality. This step is crucial for customizing the thermostat to your HVAC system’s requirements.
6.2 Configuring Installer Setup Options (ISU)
Once in the Installer Setup Menu, navigate to the ISU options using the arrow keys. Select the desired configuration by pressing “Select.” Configure system parameters such as heat pump type, stage settings, and ventilation options. Set the equipment type (e.g., gas, electric) and specify the number of heating and cooling stages. Ensure the slider tabs are correctly set for wiring compatibility. After configuring, scroll to “Save” and press “Select” to confirm changes. Proper ISU configuration ensures the thermostat operates efficiently with your HVAC system, optimizing performance and energy savings.
6.3 Advanced Settings for Customization
Access the advanced settings menu to customize your thermostat further. Enable geofencing to adjust temperatures based on your location or set up smart recovery to pre-cool or pre-heat your home. Configure temperature limits to prevent extreme settings and optimize energy use. Adjust the fan operation timings and humidity control settings if applicable. Enable or disable features like adaptive learning and smart alerts. Ensure compatibility with smart home systems by configuring integration settings. These advanced options allow you to tailor the thermostat’s performance to your specific needs and preferences, enhancing comfort and efficiency.
Wi-Fi Setup and Network Configuration
Connect the Honeywell T6 Pro Wi-Fi Thermostat to your network by selecting your Wi-Fi name, entering the password, and ensuring successful connection for smart features to function.
7.1 Connecting the Thermostat to Your Wi-Fi Network
To connect the Honeywell T6 Pro Wi-Fi Thermostat to your network, navigate to the Wi-Fi settings on the thermostat. Select your network from the list, enter your password, and confirm. Ensure the thermostat displays a successful connection. If issues arise, restart the thermostat or perform a factory reset. Consult the manual for detailed troubleshooting steps to resolve connectivity problems and ensure proper network configuration for optimal performance.
7.2 Troubleshooting Wi-Fi Connectivity Issues
If the thermostat fails to connect to your Wi-Fi network, ensure your network name and password are entered correctly. Restart the thermostat and router to refresh the connection. Check that the thermostat is within range of your router and free from interference. Perform a factory reset if necessary, then retry the setup process. If issues persist, verify network compatibility or consult the Honeywell T6 Pro Wi-Fi Thermostat manual for advanced troubleshooting steps to resolve connectivity problems effectively.
Using the Honeywell T6 Pro Wi-Fi Thermostat
The Honeywell T6 Pro Wi-Fi Thermostat offers a user-friendly interface for easy navigation. It allows scheduling, geofencing, and voice control, optimizing energy use and comfort seamlessly. With smart home integration, it adapts to your lifestyle, ensuring efficient temperature management. This thermostat is designed to provide convenience, energy savings, and reliability, making it ideal for modern smart home systems.
8.1 Navigating the Thermostat Interface
Navigating the Honeywell T6 Pro Wi-Fi Thermostat’s interface is straightforward. The touchscreen display provides easy access to temperature settings, scheduling, and system modes. Users can scroll through menus to adjust comfort levels, view energy usage, and access advanced features like geofencing. The interface is intuitive, with clear labels for heating, cooling, and fan operations. It also includes prompts for setup and maintenance, ensuring a seamless user experience. This design simplifies daily interactions, making it easy for homeowners to manage their comfort settings efficiently.
8.2 Scheduling Temperature Settings
Scheduling temperature settings on the Honeywell T6 Pro Wi-Fi Thermostat allows for precise control of your home’s comfort. Users can create daily and weekly programs to automatically adjust temperatures during specific times. The thermostat’s interface provides an intuitive scheduling menu, enabling easy setup of wake, sleep, and away periods. Remote scheduling via the Honeywell Home app adds convenience, ensuring energy efficiency by adjusting temperatures when the house is unoccupied. This feature helps optimize energy usage while maintaining comfort, making it ideal for busy households with varying routines.
8.3 Energy-Saving Features and Tips
The Honeywell T6 Pro Wi-Fi Thermostat offers energy-saving features like geofencing, smart home integration, and voice control. These features help reduce energy consumption by optimizing temperature settings based on occupancy and preferences. The thermostat also learns your schedule to automatically adjust temperatures, minimizing waste. For added efficiency, users can enable energy-saving modes and monitor energy usage through the Honeywell Home app. Regularly updating schedules and utilizing the thermostat’s smart algorithms can further enhance energy savings, ensuring your home remains comfortable while reducing utility bills.

Ventilation Systems and Compatibility
The Honeywell T6 Pro Wi-Fi Thermostat is designed to integrate with various ventilation systems, ensuring optimal air quality and energy efficiency. It supports compatibility with existing HVAC systems, allowing seamless control of ventilation settings for improved comfort and performance. Proper configuration ensures balanced air circulation, enhancing overall system efficiency and indoor air quality. This feature is essential for maintaining a healthy and energy-efficient home environment.
9.1 Configuring Ventilation Settings
Configuring ventilation settings on the Honeywell T6 Pro Wi-Fi Thermostat ensures optimal air quality and energy efficiency. Navigate to the ventilation menu to select options that match your system. Choose from automated or manual modes to control airflow. Ensure compatibility with your HVAC system for balanced circulation. Adjust settings to enhance indoor air quality and reduce energy consumption. Refer to the manual for specific instructions tailored to your ventilation setup.
9.2 Integration with Existing Ventilation Systems
Integrating the Honeywell T6 Pro Wi-Fi Thermostat with your existing ventilation system enhances overall performance and efficiency. Ensure compatibility by verifying your HVAC system’s specifications. Connect the thermostat to your ventilation controls to synchronize operation. This integration allows for precise airflow management, improving indoor air quality and energy efficiency. Use the thermostat’s advanced features to automate ventilation based on temperature and humidity levels, ensuring a comfortable environment year-round. Proper installation and configuration are essential for seamless integration and optimal functionality.
Advanced Features and Customization
The Honeywell T6 Pro Wi-Fi Thermostat offers geofencing, smart home integration, and voice control via smart speakers, enabling advanced customization for enhanced energy efficiency and comfort.
10.1 Geofencing and Smart Home Integration
Geofencing allows the Honeywell T6 Pro Wi-Fi Thermostat to adjust temperatures based on your location, optimizing energy use. Integration with smart home systems like Amazon Alexa and Google Assistant enables voice control and seamless automation. By connecting to your home network, the thermostat can receive updates and adapt to your schedule, enhancing comfort and efficiency. This feature ensures your home is always at the right temperature when you arrive, without unnecessary energy consumption.
10.2 Voice Control via Smart Speakers
Experience effortless temperature control with voice commands using Amazon Alexa or Google Assistant. The Honeywell T6 Pro Wi-Fi Thermostat integrates seamlessly with smart speakers, allowing you to adjust settings hands-free. Simply say, “Set the living room to 72 degrees,” and enjoy precise comfort. This feature enhances convenience, enabling you to manage your home’s climate without lifting a finger. Voice control adds a modern layer of accessibility, making it easier than ever to maintain your ideal environment, all while staying compatible with your existing smart home setup.

Maintenance and Troubleshooting
Regularly clean the thermostat’s display and sensors to ensure accuracy. Check for software updates and verify wire connections. Address common issues like loose wires promptly for optimal performance.
11.1 Regular Maintenance Tips
Regular maintenance ensures the Honeywell T6 Pro Wi-Fi Thermostat operates efficiently. Turn off power at the breaker before cleaning the display with a soft cloth. Check for firmware updates to keep the system optimized. Inspect wires for loose connections and tighten if necessary. Replace batteries (if applicable) every 6-12 months to avoid interruption. Schedule annual HVAC system checks to maintain performance. Clean air vents and filters to improve airflow and accuracy; These steps help prevent issues and extend the thermostat’s lifespan, ensuring reliable temperature control year-round.
11.2 Common Issues and Solutions
Common issues with the Honeywell T6 Pro Wi-Fi Thermostat include unresponsive Wi-Fi setup, connectivity loss, or display malfunctions. For Wi-Fi issues, reset the thermostat and reconnect to your network. If the display is unresponsive, check for loose wire connections or perform a factory reset. Ensure the thermostat is updated with the latest firmware. For persistent problems, consult the manual or contact Honeywell support. Regular maintenance and updates often resolve these issues, ensuring smooth operation and reliable temperature control.
After completing the installation, verify all connections and settings. Ensure the thermostat operates correctly and efficiently. Refer to the manual for any additional support needed.
12.1 Verifying Proper Installation
After installation, ensure the Honeywell T6 Pro Wi-Fi Thermostat is securely mounted and all wires are correctly connected. Verify the power is turned on at the breaker box. Check that the thermostat powers up and responds to basic commands. Test temperature adjustments to confirm the HVAC system operates as expected. Use the thermostat interface or app to ensure Wi-Fi connectivity and remote functionality. Review all settings to ensure they align with your preferences. This step ensures your system is installed correctly and functions optimally for consistent performance and energy efficiency.
12.2 Ensuring Optimal Performance
After installation, verify that the Honeywell T6 Pro Wi-Fi Thermostat operates smoothly by checking temperature accuracy and system responsiveness. Ensure proper calibration by comparing the thermostat’s reading with a reliable thermometer. Regularly inspect wire connections and battery levels (if applicable) to avoid disruptions. Schedule periodic software updates to maintain the latest features and improvements. Finally, review energy usage reports and adjust settings to optimize efficiency, ensuring the thermostat performs at its best for consistent comfort and energy savings.

Additional Resources
Visit the official Honeywell website or ManualsLib for the Honeywell T6 Pro Wi-Fi Thermostat manual. Explore online support forums and customer service for further assistance and troubleshooting.
13.1 Honeywell T6 Pro Wi-Fi Thermostat Manual
The Honeywell T6 Pro Wi-Fi Thermostat manual provides a detailed step-by-step guide for installation, operation, and maintenance. It includes technical specifications, wiring diagrams, and troubleshooting tips. The manual also covers advanced features like geofencing and smart home integration. Available on the official Honeywell website and ManualsLib, it ensures users can seamlessly set up and customize their thermostat. Refer to this resource for comprehensive instructions and optimal performance of your Honeywell T6 Pro Wi-Fi Thermostat.
13.2 Online Support and Customer Service
Honeywell offers comprehensive online support and customer service resources for the T6 Pro Wi-Fi Thermostat. Users can access troubleshooting guides, FAQs, and detailed installation manuals on the official Honeywell website. Additionally, Honeywell provides dedicated customer support via phone, email, and live chat to address installation or operational issues. Online forums and community discussions also serve as valuable resources for peer-to-peer assistance and tips. These support channels ensure users can resolve any challenges quickly and efficiently, enhancing their overall experience with the Honeywell T6 Pro Wi-Fi Thermostat.