
A DIY Cookie Kit is a convenient and creative bundle featuring pre-baked cookies, vibrant frosting, and assorted decorations, perfect for gifting, parties, or family activities, fostering creativity and joy for bakers of all ages.
What is a DIY Cookie Kit?
A DIY Cookie Kit is a thoughtfully curated collection of pre-baked cookies, vibrant royal icing, assorted decorations, and clear instructions, designed to simplify cookie decorating. Perfect for all skill levels, these kits eliminate the need for scratch baking, offering a ready-to-decorate experience. They typically include sugar cookies in various shapes, colored icing, sprinkles, and tools like piping bags or spatulas. Ideal for gifting, parties, or family fun, DIY Cookie Kits foster creativity and provide a memorable baking experience for both beginners and experienced decorators alike.
Benefits of Creating a DIY Cookie Kit
Creating a DIY Cookie Kit offers numerous benefits, including convenience, cost-effectiveness, and the joy of a hands-on creative experience. It saves time by eliminating the need to bake cookies from scratch, allowing users to focus on decorating. The kits are ideal for gifts, parties, or family activities, fostering bonding and fun. They also cater to all skill levels, making them accessible to both beginners and experienced decorators. Additionally, DIY Cookie Kits provide a sense of accomplishment and pride in creating something personalized and delicious, making them a thoughtful and memorable treat for any occasion.
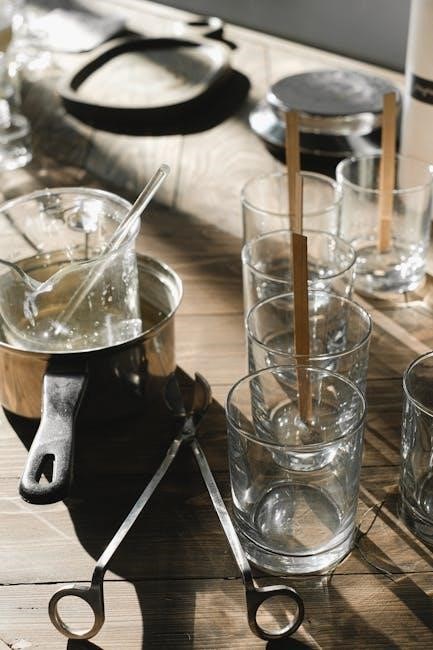
Materials Needed for Your DIY Cookie Kit
Your DIY Cookie Kit requires pre-baked cookies, vibrant frosting, assorted decorations, essential tools, and packaging materials to create a delightful and complete cookie-decorating experience.
Ingredients for Cookies and Frosting
Your DIY Cookie Kit requires high-quality ingredients for both cookies and frosting. For cookies, use flour, sugar, butter, eggs, and vanilla extract. For frosting, include powdered sugar, butter or cream cheese, milk, and flavorings. Add gel food coloring for vibrant icing colors. Ensure all ingredients are fresh and of good quality for the best taste and texture. Properly measure and package each component to simplify the decorating process. Avoid liquid food coloring to maintain frosting consistency. Store ingredients in airtight containers to preserve freshness and prevent spoilage.
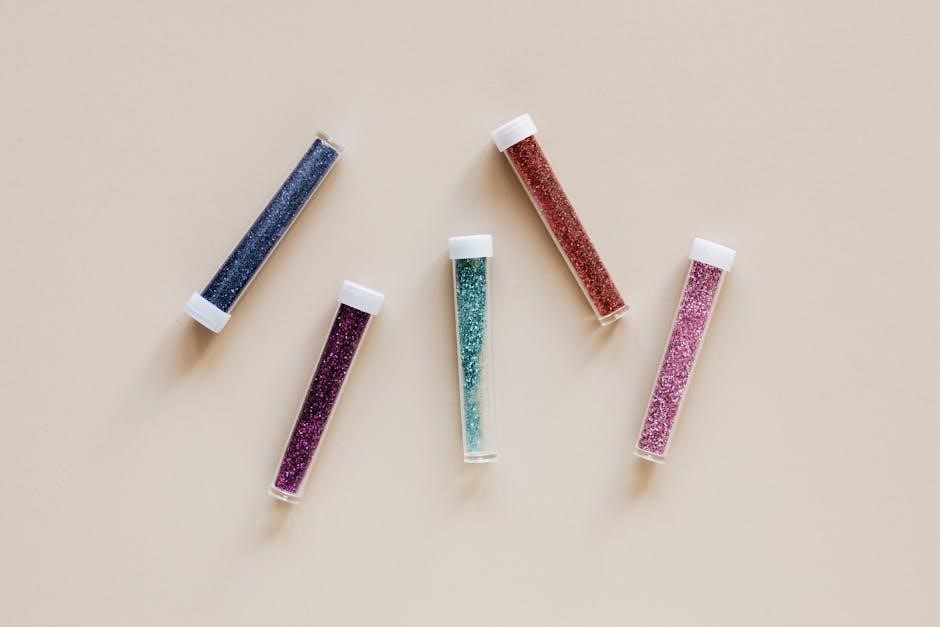
Decorations and Tools
Your DIY Cookie Kit should include a variety of decorations like sprinkles, nonpareils, sanding sugar, and edible glitter. Add themed decorations for holidays or events, such as heart-shaped sprinkles for Valentine’s Day. Tools like an offset spatula, piping bags, and tips are essential for smooth frosting application. Include small spoons or tweezers for precise decoration placement. Package decorations in airtight containers or resealable bags to maintain freshness. Use color-coded labels for easy identification. These elements ensure a fun and creative experience, making your kit both functional and visually appealing.

Baking Your Cookies
Bake cookies at 375°F for 8-10 minutes until lightly golden. Allow cooling on a rack before frosting. This ensures crisp edges and chewy centers.
Preparing the Cookie Dough
Begin by creaming butter and sugars in a stand mixer until light and fluffy. Add eggs and mix until well combined. Gradually incorporate sifted flour, baking powder, and salt. Wrap dough in plastic, chill for 30 minutes, then roll out on a floured surface to 1/4 inch thickness. Cut shapes with cookie cutters, place on parchment-lined baking sheets, and bake at 375°F until golden. Ensure dough is handled gently to avoid overworking, achieving tender cookies ideal for decorating.
Baking Tips for Perfect Cookies
For perfect cookies, ensure dough is chilled to prevent spreading. Use parchment-lined baking sheets and bake at 375°F for 8-10 minutes, until edges are golden. Avoid overbaking to retain softness. Cool cookies on sheets for 5 minutes before transferring to wire racks. For even baking, rotate sheets halfway. Use room-temperature ingredients for consistent dough. Lightly tap sheets post-baking to prevent air bubbles. Store cooled cookies in airtight containers to maintain freshness and texture, ensuring they remain soft and ready for decorating in your DIY kit.
Making the Frosting
Combine powdered sugar, meringue powder, and water to create royal icing. Mix until smooth, adding gel food coloring for vibrant hues. Avoid liquid coloring to maintain consistency.
Royal Icing Recipe
To make royal icing, combine 2 cups powdered sugar, 2 tablespoons meringue powder, and 2-3 tablespoons water in a bowl. Sift the powdered sugar first to remove lumps. Mix on low speed until smooth and creamy. Add gel food coloring gradually to achieve desired shades. Avoid using liquid food coloring, as it can thin the icing. Store the icing in an airtight container, covering the surface with plastic wrap to prevent crusting. Use immediately or refrigerate for up to 3 days. This icing is perfect for outlining and flooding cookies.
Coloring and Consistency Tips
For vibrant royal icing, use gel food coloring, adding drops gradually to achieve desired shades. Avoid liquid food coloring, as it can thin the icing. Adjust consistency by adding water for a thinner icing (ideal for flooding) or powdered sugar for a thicker consistency (perfect for outlining). Store icing in airtight containers, covering the surface with plastic wrap to prevent drying. Use immediately or refrigerate for up to 3 days. Proper consistency ensures smooth, even application, while color accuracy enhances the visual appeal of your cookie designs.

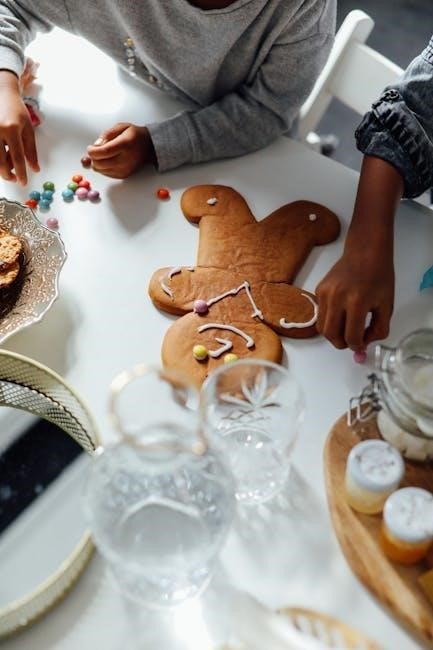
Decorating Techniques
Discover various methods to transform plain cookies into edible art, from basic frosting techniques to intricate designs, offering endless creative possibilities for all skill levels.
Basic Decorating Techniques
Start with outlining cookies using royal icing piping bags, then flood the center for a smooth base. Use sprinkles, edible decorations, and tools like offset spatulas or tweezers for precise placement. Dip cookies in frosting or spread evenly with knives. Experiment with layering or drizzling techniques for added texture. For consistent results, ensure icing reaches the correct consistency. Add decorations immediately before icing hardens. Keep tools clean and dry to prevent smudging. Practice these foundational methods to build confidence and create visually appealing designs with ease, perfect for beginners or quick projects.
Advanced Decorating Methods
Elevate your cookie decorating skills with intricate techniques like stenciling, layering, and texture manipulation. Use fine-tipped piping bags for detailed designs, such as borders or floral patterns. Experiment with ombré effects by gradating icing colors. Add dimension with 3D elements like royal icing flowers or fondant shapes. For seamless layering, allow each layer to set before adding more details. Incorporate metallic dust or edible glitter for a luxurious finish. Practice precision and patience to master these sophisticated methods, transforming your cookies into stunning, professional-looking pieces that impress and inspire.
Packaging Your DIY Cookie Kit

Packaging Your DIY Cookie Kit
Package your DIY cookie kit with care: place cookies in airtight containers, seal icing in piping bags, and add decorations in small, labeled jars for a polished presentation.
How to Package Cookies
Package cookies securely to maintain freshness and presentation. Wrap each cookie individually in food-grade cellophane or plastic wrap to prevent sticking. Place wrapped cookies in an airtight container, such as a tin or plastic box with a tight-fitting lid. Add a food-safe desiccant packet to absorb moisture and extend shelf life. Line the container with parchment paper or bubble wrap for cushioning. Arrange cookies neatly for visual appeal and seal the container tightly with tape or a decorative ribbon. Store in a cool, dry place away from direct sunlight to preserve flavor and texture.
How to Package Icing and Decorations
Package icing and decorations neatly to ensure convenience and freshness. Use disposable or reusable piping bags for icing, securing them with rubber bands or ties. Include pre-cut tips or leave bags uncut, and label colors for easy identification. Store filled bags in airtight containers or resealable bags to prevent drying. Place decorations like sprinkles in small, airtight containers or resealable bags to maintain freshness. Add labels or color-code for easy access. Store everything in a cool, dry place to preserve quality and make decorating straightforward and enjoyable.

Creating the Instruction Card
A well-designed instruction card is essential for guiding users through the cookie decorating process, ensuring clarity and ease of use for a enjoyable experience.
Designing Clear Instructions
Creating clear instructions for your DIY cookie kit is essential for ensuring a seamless decorating experience. Use simple, concise language and break down steps into manageable parts. Incorporate visual aids like images or diagrams to illustrate key techniques, such as icing application or sprinkle placement. Highlight important tips, like achieving the right icing consistency or avoiding common mistakes. Include customization ideas to inspire creativity. Ensure the instructions are visually appealing and easy to follow, making the process enjoyable for bakers of all skill levels. This clarity enhances the overall experience and satisfaction of using the kit.
Adding Visual Aids and Tips
Enhance your instruction card by adding visual aids such as step-by-step images or diagrams to illustrate decorating techniques. Include examples of finished cookies to inspire creativity. Provide practical tips, like achieving the perfect icing consistency or preventing air bubbles. Share storage advice, such as keeping icing in airtight containers, and suggest tools like tweezers for precise decoration. Offer customization ideas, like themed designs for holidays. These additions make the process intuitive and enjoyable, ensuring users feel confident and creative while decorating their cookies.
Troubleshooting Common Issues
Address common challenges like icing consistency, air bubbles, or cookies sticking together. Provide solutions such as adjusting icing thickness, tapping out air, or freezing cookies briefly for easier handling.
Common Mistakes and Solutions
When assembling or using a DIY cookie kit, common mistakes include overmixing icing, incorrect frosting consistency, or improper cookie storage. To fix, adjust icing by adding powdered sugar or water, and store cookies in airtight containers. Air bubbles in icing can be resolved by tapping the bag gently. If cookies stick together, freeze them briefly before separating. For decorating, avoid applying too much icing at once, as it can overflow. Regularly clean and dry tools to prevent contamination. By addressing these issues, you ensure a seamless and enjoyable cookie decorating experience for everyone. Proper troubleshooting enhances the overall quality and fun of your DIY kit.
Ensuring Freshness and Quality
To maintain freshness in your DIY cookie kit, store pre-baked cookies in airtight containers to prevent moisture absorption. Keep them in a cool, dry place away from direct sunlight. Use desiccant packets to absorb excess moisture and extend shelf life. For frosting, store it in sealed, airtight containers or piping bags, refrigerating if not used immediately. Ensure all ingredients are of high quality and have a reasonable shelf life. Proper packaging and storage techniques help preserve the taste, texture, and appearance of your cookies, ensuring a delightful experience for recipients. Attention to these details guarantees freshness and quality.
Marketing Your DIY Cookie Kits
Highlight your kit’s unique features, such as homemade cookies or custom designs, and use social media to showcase vibrant, attractively packaged kits that appeal to crafty bakers.
Highlighting Unique Features
Emphasize the convenience and creativity of your DIY cookie kit by showcasing its unique features. Highlight the inclusion of pre-baked, high-quality cookies, vibrant frosting, and a variety of decorations. Mention the customization options, such as themed kits for holidays or special occasions, which add personal touches. Clear, easy-to-follow instructions and attractive packaging further enhance appeal. These features cater to both kids and adults, making the kit ideal for gifting or enjoying together. The combination of convenience, quality, and creativity makes your DIY cookie kit a standout product.
Effective Marketing Strategies
To successfully market your DIY cookie kits, leverage high-quality images and videos showcasing the kits’ creativity and convenience. Utilize social media platforms like Instagram and Pinterest to share engaging content, such as decorated cookie examples and step-by-step tutorials. Highlight user-generated content to build authenticity and encourage customers to share their creations. Additionally, optimize your website with SEO-friendly content, such as blog posts or tutorials, to attract organic traffic. Consider email marketing campaigns to keep customers informed about new kits, promotions, or seasonal offerings. Collaborate with influencers or bloggers to expand your reach and build credibility, ensuring your DIY cookie kits stand out in the market and drive sales.
DIY Cookie Kits for Special Occasions
Customize your DIY cookie kits for holidays, birthdays, or themed parties with tailored decorations and creative designs, making them a delightful and personalized treat for any celebration.
Customizing for Holidays
Transform your DIY cookie kits into festive treats by tailoring them to specific holidays; For Valentine’s Day, include heart-shaped cookies and pink frosting. At Christmas, add snowflake decorations and red-and-green icing. Halloween kits can feature spooky shapes and orange-black color schemes. Use themed sprinkles, such as shamrocks for St. Patrick’s Day or eggs for Easter. Packaging can also reflect the occasion, with holiday-themed boxes or ribbons. These customized kits make thoughtful gifts or activity sets for family gatherings, offering a fun and creative way to celebrate any holiday with delicious, personalized cookies.
Creating Themed Kits
Themed DIY cookie kits offer a fun and creative way to add personality to your cookie decorating experience. Choose a theme, such as mermaid, space, or garden, and tailor the contents accordingly. Select cookie shapes, frosting colors, and decorations that match the theme. For example, a mermaid kit could include ocean-blue icing and seashell-shaped cookies. Add theme-specific instructions or inspiration cards to enhance the experience. Packaging should reflect the theme, with coordinating colors and designs. This approach allows for endless creativity and makes the kit a unique and engaging activity for any occasion.
Creating DIY cookie kits offers endless fun and creativity, perfect for gifts or personal enjoyment. Share the joy of baking and decorating with ease and love!
Final Tips for Success
Plan ahead and organize materials neatly. Use high-quality ingredients for the best taste and appearance. Provide clear, step-by-step instructions for easy decorating. Include visual examples to inspire creativity. Ensure all items are fresh and securely packaged. Encourage users to experiment with designs while following basic guidelines. Store kits in a cool, dry place to maintain freshness. Add a personal touch, like a handwritten note, for a heartfelt finish. These tips will help create a delightful and memorable DIY cookie kit experience for everyone to enjoy.
Enjoying Your DIY Cookie Kit Experience
Embrace the creativity and joy of decorating cookies with your DIY kit! Perfect for all ages, it’s a fun activity that sparks imagination and brings people together. Take your time to experiment with colors, designs, and decorations. The process is just as rewarding as the final result. Share the experience with family and friends, creating lasting memories. Don’t hesitate to try new techniques or traditions. The satisfaction of crafting something beautiful and delicious is unparalleled. Make it a special treat or a thoughtful gift, spreading joy and happiness with every decorated cookie.